Skill Level: Intermediate
Time: 45 Minutes
You'll need: Lino sheets, pencil, cutter, roller, acrylic paint, spoon, paper
- Transferring the Shape and Colouring the Background:

Take a sheet of paper and use a pencil to colour in one side entirely. This will serve as the background color for your print.
Place the coloured side of the paper onto your sheet of lino, ensuring it covers the entire area.
On the reverse side of the paper, draw the shape of a vase using a pencil. The pressure applied will transfer the pencil outline onto the lino sheet.
- Cutting the Horizontal Lines:

Use the fine blade of your lino cutting tools to cut evenly spaced straight lines horizontally across the lino sheet. These lines will create the texture or pattern on the vase.
Following the pencil outline you transferred onto the lino sheet, use the fine blade to carefully cut out the shape of the vase. Ensure that you cut precisely along the outline.
- Transferring the Shape and Adding Leaves:

Repeat the pencil transfer process by placing the coloured side of the paper onto a larger sheet of lino. Leave space at the top for the plant leaves.
Draw the shape of the leaves on the reverse side of the paper, ensuring they align with the top of the vase shape on the lino sheet.
- Cutting the Vertical Lines:

Use the fine blade to cut the same size lines as before, but this time cut them vertically. These lines will create the texture or pattern on the leaves.
Carefully cut away the leaf shapes from the lino sheet, following the pencil outline. Remember to always cut away from your body to ensure safety.
- Applying Ink to the Lino Sheet:

Take the roller and roll it into the paint ensuring it is evenly coated.
Roll the ink onto the surface of the lino sheet, covering the full area with paint.
Apply even pressure and roll back and forth to achieve consistent coverage.
- Printing the Design:

Place a sheet of printing paper on top of the inked lino sheet, ensuring it’s where you want to print it, as you can’t move it once it is down.
Use the back of a spoon to gently rub the other side of the paper. Apply firm and even pressure to ensure a good print.
Carefully lift the printed paper from the lino block, revealing your printed design. Allow the print to dry completely before starting with the second colour.
Wash your lino sheet under warm water, you can use a toothbrush to clean all the small indents.
- Printing the Second Layer:

Apply ink or paint to the sheet of lino that contains the leaf shapes, using a different colour - such as blue.
Line up the blue layer with the base of the previously printed red layer. Ensure that the alignment is correct.
Gently pull back the paper from the lino sheet to reveal your finished print. Be careful not to smudge the ink or paint during this process.
Allow the print to dry completely before handling or displaying it.
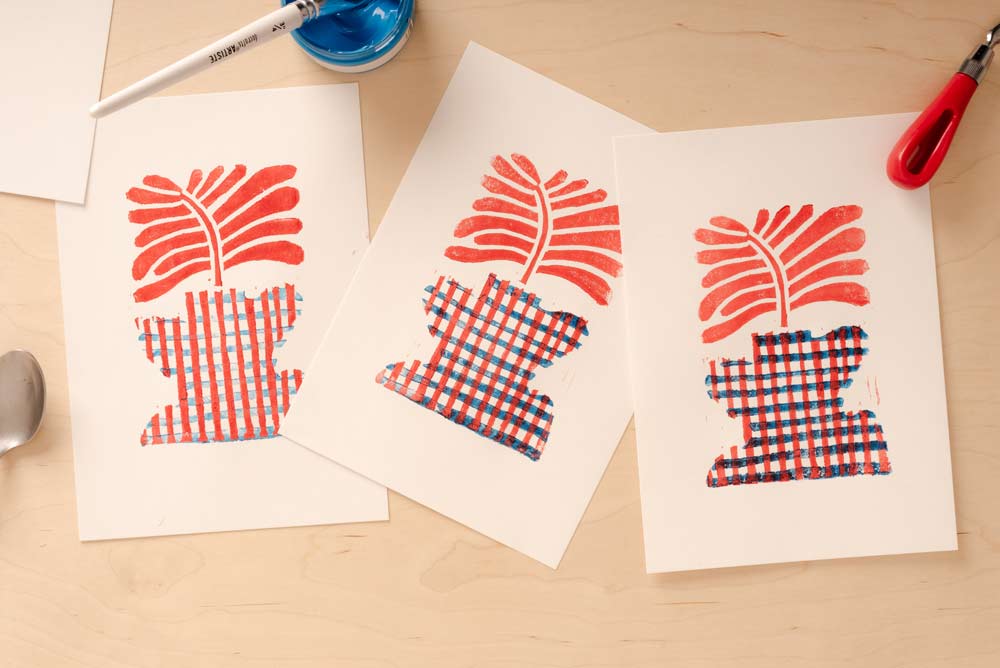
Test Prints!

Doing test prints is crucial in the process of printmaking as the first print often
doesn’t turn out as expected. Test prints allow you to identify any issues with ink coverage, alignment, or pressure before committing to the final prints.
This initial print serves as a valuable opportunity to make adjustments, refine your technique, and ensure that subsequent prints yield the desired results.
The photo above demonstrates the noticeable difference between the first, second, and third prints, highlighting the importance of test printing for achieving a
high-quality final outcome.